Should You Seal Grout After Cleaning? Benefits, Timing, and What to Know
Quick answer: Yes, in most cases you should seal grout after cleaning. Cement-based grout is porous, so sealing helps reduce staining and water absorption once it’s fully dry — usually 24-72 hours after a professional tile & grout cleaning. Epoxy grout, damaged grout, and areas with active leaks are exceptions where sealing isn’t needed or isn’t appropriate yet.
We get this question constantly after finishing a tile & grout job somewhere in the Denver metro — homeowner walks the floor, sees how much brighter the grout lines look, and asks, ‘So do I need to seal it now?’ It’s a fair question, and the honest answer has some nuance to it. This article covers what grout sealing actually does, whether you need it, the real benefits (and their limits), the types of sealer available, and the right timing so you don’t undo good cleaning work by sealing too soon.
What Is Grout, and Why Does It Need Sealing?
Grout is a cement-based material — cement, fine sand or aggregate, water, and sometimes polymer additives — that fills the joints between tiles. Once it cures, it holds tile in place and keeps debris out of the gaps, but it’s not a solid, sealed surface like glazed tile. It’s full of microscopic pores.
That porosity is the whole reason sealing comes up. Cured cement grout can absorb water, oils, and whatever’s dissolved in the liquid sitting on it. That’s why grout lines discolor faster than the tile around them — coffee, grease splatters, muddy shoe prints, and cleaning residue all have a place to soak in instead of just sitting on the surface.
Not all grout behaves the same way, though:
- Cementitious grout (the standard in most Denver metro homes) is genuinely porous and generally benefits from a tile grout sealer.
- Epoxy grout is far less absorbent by nature. It’s often installed in newer or higher-end kitchens and bathrooms, and it typically doesn’t need a traditional penetrating sealer.
- Natural stone tile adds another layer to the decision. Stone like travertine, slate, or marble can be porous in its own right and needs a stone-compatible sealer — this isn’t just a grout question anymore once stone is involved.
Grout also gets dirty faster than the tile field for a simple mechanical reason: the joints are recessed, so they trap dust, food particles, soap scum, and soil that would otherwise just get swept off a flat surface. If the grout is porous, those substances don’t stay on top — they migrate below the surface, which is why scrubbing alone sometimes can’t fully restore the original color.
Professional cleaning matters here, but it’s important to be clear about what it does and doesn’t do. Our 3-stage process — pre-spray treatment to break down embedded soil, an alkaline clean to lift grease and grime, and a chemical neutralization step — combined with truck-mounted hot water extraction, pulls out years of buildup that a mop and store-bought spray can’t touch. What it doesn’t do is permanently change the porous structure of the grout itself. That’s a separate step, and that’s where sealing comes in.
Do You Need to Seal Grout After Cleaning?
For most porous, cement-based grout in kitchens, bathrooms, entryways, and other high-traffic floors, sealing after a thorough cleaning is a reasonable and commonly recommended step. It’s not, however, something every tile floor in every home strictly requires.
Here’s when sealing usually doesn’t apply, or shouldn’t happen yet:
- Epoxy grout — rarely needs a traditional sealer because it’s already low-absorption.
- Low-traffic decorative tile — think an accent wall or a rarely-used powder room; the practical benefit is limited.
- Damaged, cracked, or crumbling grout — this needs repair or regrouting first. Sealing over compromised grout doesn’t fix the underlying problem.
- Wet or mold-affected grout — you have to find and fix the moisture source and let the area fully dry before anything else. Never seal over dampness or existing contamination; it traps the problem in place.
- Natural stone installations — these need a stone-compatible product, not a generic tile grout sealer.
So who benefits the most? In our experience working across Denver, Aurora, Lakewood, Highlands Ranch, and the surrounding metro, it’s usually:
- Kitchen floors and backsplashes exposed to grease and food spills.
- Bathroom floors that see standing water and soap residue.
- Entryway tile that takes a beating from wet shoes and winter road salt/soil.
- Homes with pets, where accidents happen on tile.
- Rental units and multifamily properties with high tenant turnover, where grout takes more abuse between deep cleans.
A couple of practical notes: if you’re renting, check your lease or get sign-off from your landlord before sealing anything yourself — it’s a modification to the property. And if you manage a commercial or multifamily property, follow whatever flooring specs are already on file rather than assuming a generic sealer is appropriate.
One more thing worth being upfront about: our tile & grout service is focused on deep cleaning — the pre-spray, alkaline clean, and neutralization process described above. Sealing is typically a separate follow-up step, whether you handle it yourself or arrange it as an add-on where it’s offered. We’re not going to tell you it’s automatically bundled into every cleaning visit, because that’s not accurate.
If you want the deep-clean groundwork done right before you even think about sealing, that’s really the foundation — you can see more about how that process works on our tile and grout cleaning page.
How Long to Wait Before Sealing
There’s no single universal number here, and anyone who gives you one exact hour count is oversimplifying it. Drying time depends on how much water was used during cleaning, how deep and porous the grout is, ventilation in the room, and the ambient temperature and humidity.
That said, a practical range for most residential jobs is 24 to 72 hours of drying time before sealing. Always check the sealer manufacturer’s instructions too, since some products have their own specific drying requirements.
The rule that matters most: never seal damp grout. If there’s trapped moisture underneath the surface, sealing over it can prevent proper adhesion and lock in a moisture problem you can’t see. Grout can feel bone-dry to the touch on top while still holding water a few millimeters down. Use good airflow — open windows, run a fan, use your bathroom exhaust fan longer than usual — and don’t rely on touch alone to judge readiness.
Grout Sealing Benefits (and Their Real Limits)
Sealing genuinely helps, but it’s worth knowing exactly what it does and doesn’t do so you’re not disappointed six months later.
- Reduced staining, easier cleanup. A sealer slows down how fast liquids and soil work into porous grout, which buys you time to wipe up a spill before it sets in. It’s not stain-proof, though — red wine, turmeric, or grease left sitting overnight can still leave a mark, sealer or not.
- Reduced water absorption. Penetrating sealers cut down how much water the grout soaks up, without leaving a visible film — helpful in kitchen splash zones and bathroom floors. But don’t confuse this with waterproofing. A shower that leaks behind the wall is a construction issue involving membranes, substrate, and drainage — a grout sealer doesn’t touch that.
- Easier routine maintenance. Sealed grout sweeps and damp-mops more easily and tends to hold up better between deep cleanings. It still needs regular care — sweeping, wiping spills promptly, damp mopping with a compatible cleaner, and keeping wet areas ventilated and dried out.
- Odor considerations. Cleaning removes existing soil and odor-causing residue that’s already in the grout. Sealing can reduce how much future spills — like pet urine — get absorbed going forward. But sealing does not eliminate an odor or mold problem that’s already there. If there’s an existing odor issue, moisture control and ventilation are what actually solve it, not sealer.
- Longer service life between deep cleans, possibly lower long-term costs. A properly applied sealer may stretch out how often you need intensive cleaning or cosmetic repair. It doesn’t guarantee you’ll never need to regrout, though — cracking, poor original installation, harsh chemicals, abrasive scrubbing, and ongoing leaks can all cause damage regardless of whether the grout is sealed.
Types of Tile Grout Sealer — Which One Do You Need?
Penetrating (Impregnating) Sealers
These soak into the pores of the grout itself and leave little to no visible film on the surface. They’re the best fit for most interior residential cement grout — kitchen floors, bathroom floors, entryways — anywhere you want the grout to still look natural afterward.
The advantages are real: minimal visible change to color or sheen, lower risk of flaking or peeling compared to topical products, and they’re generally easier for a homeowner to apply correctly.
Membrane (Topical) Sealers
These form a film on or near the surface of the grout, and some add a bit of sheen or slight color enhancement. There are real trade-offs to know about before choosing one: they can peel or wear faster in wet areas, they can trap moisture if applied over grout that isn’t fully dry, they’re harder to remove later if you change your mind, and they can look uneven on textured tile.
Whether a topical sealer is appropriate really depends on the specific product’s technical data sheet and the installation itself. Shower floors and other areas with regular vapor exposure need product-specific guidance — this isn’t a one-size-fits-all recommendation.
Grout Colorant vs. Grout Sealer
Worth clarifying since these get confused: a grout colorant or stain changes the actual color of the grout and may offer some incidental protection, but it’s a different product category from a clear penetrating sealer. If your goal is restoring uniform color to grout that’s discolored unevenly, a colorant is a separate option worth knowing exists — it’s not the same thing as standard sealing.
Application Basics
A few concrete steps apply across most penetrating sealers:
- Grout must be clean, free of residue, and fully dry before you start.
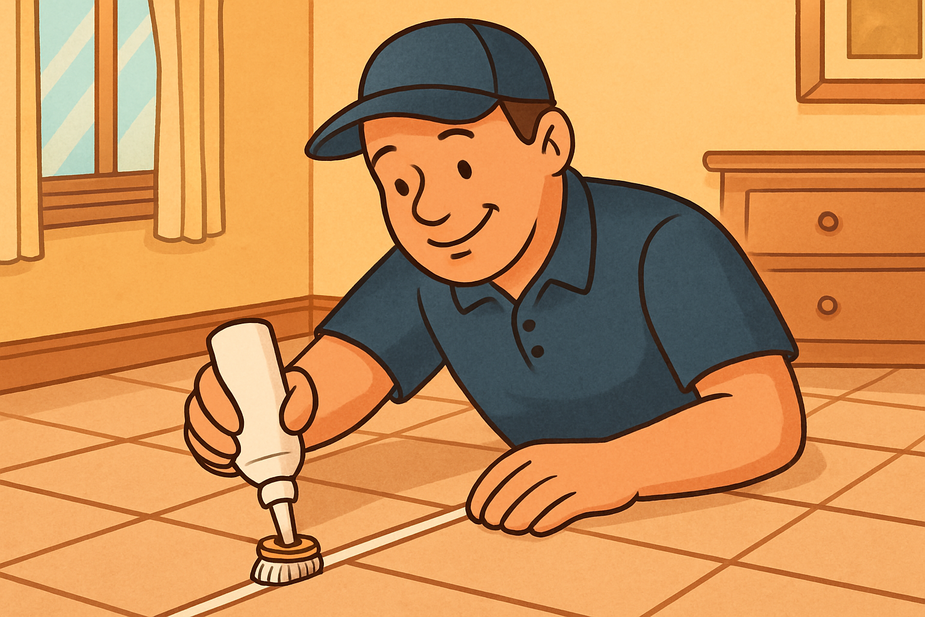
- Apply with a small brush, foam applicator, roller, or applicator bottle depending on the product.
- Use thin, even coats — don’t flood the joints.
- Wipe excess sealer off the tile surface before it dries; sealer left to dry on tile can leave a hazy film.
- Test in an inconspicuous area first, especially on natural stone, unglazed tile, textured surfaces, or colored grout, to check for darkening or haze.
- Cure time commonly runs 24-72 hours, but always check the specific product’s label or technical data sheet — light foot traffic timing and full water exposure timing (like using a shower again) are usually different.
How to Seal Grout After Professional Cleaning (Step-by-Step Best Practices)
If you’re planning to seal after a cleaning, here’s the practical order of operations:
- Inspect the installation. Identify the grout type, tile material, any cracks or missing grout, efflorescence (that white mineral haze), or signs of moisture problems.
- Clean thoroughly first. Our 3-stage process — pre-spray, alkaline clean, neutralization — combined with truck-mounted hot water extraction removes soil, grease, and old cleaning residue that would otherwise block a sealer from penetrating properly.
- Rinse and extract fully. Leftover cleaning chemical residue sitting in the grout can interfere with how well the sealer soaks in.
- Dry completely. Give it at least 24-72 hours with good ventilation and air movement. Don’t trust a quick touch test — porous grout can hold moisture below the surface long after it feels dry on top.
- Test the sealer in a small, hidden area first to check color and finish.
- Apply according to label instructions — thin, even coats, wiping excess off the tile promptly.
- Observe the cure period. Keep the area dry and limit foot traffic exactly as the product label directs.
- Resume normal maintenance using pH-neutral cleaners that are compatible with sealed grout, wipe up spills quickly, and avoid letting water stand on the floor.
How to Tell If Grout Needs Resealing
There’s a simple at-home check: place a few drops of water directly on a clean, dry grout joint. If the water beads up and sits on the surface for a bit, the seal is likely still doing its job. If it darkens the grout and soaks in fast, it’s probably time to reseal.
This is a rough field test, not a lab measurement — results can vary depending on grout age, leftover residue, and even room temperature. Don’t treat one quick test as absolute proof either way.
As for how often to reseal, resist the urge to apply a fixed rule like ‘every year’ across every home. Inspect periodically, pay closer attention to high-traffic areas and wet zones like shower floors, and follow the specific sealer product’s recommended reapplication interval rather than assuming one timeline fits every situation.
Common Grout Sealing Myths, Corrected
- Myth: Regular cleaning makes sealing unnecessary. Reality: Cleaning removes existing soil and buildup, but it doesn’t change the porosity of the grout itself. Sealing is about protecting against future absorption, which cleaning alone can’t do.
- Myth: Sealed grout never needs cleaning again. Reality: Sealed grout still collects surface dust and soil — it just resists deep absorption better. You still need to sweep and mop regularly.
- Myth: Sealer prevents all stains. Reality: It slows absorption and gives you a window to clean up spills before they set. It won’t stop every stain, especially oily substances or strongly pigmented liquids left sitting for hours.
- Myth: You can seal grout right after cleaning, same day. Reality: Grout needs to be fully dry first, commonly 24-72 hours. Sealing over damp grout can trap moisture underneath and prevent the sealer from bonding properly.
- Myth: Every type of grout needs sealer. Reality: Epoxy grout is far less absorbent by design and often doesn’t need a traditional penetrating sealer at all.
- Myth: Sealer fixes mold or a leaking shower. Reality: It does not, and it’s important not to treat it that way. Leaks, condensation buildup, and existing mold contamination require actual repair and moisture control — sealing grout on top of an active problem just hides it temporarily.
Frequently Asked Questions
Can I seal grout myself, or does it need a professional? Many homeowners apply penetrating sealer themselves with a small brush or applicator bottle, since the process is straightforward on a small residential floor. Just make sure the grout is completely dry first, test in a hidden spot, and follow the product’s label instructions closely for coat thickness and cure time.
Does Carpet Couch Cleaning seal grout as part of a cleaning visit? Our tile & grout service centers on deep cleaning — the 3-stage pre-spray, alkaline clean, and neutralization process using truck-mounted hot water extraction. Sealing is typically handled as a separate follow-up step, so ask directly about current options for your job rather than assuming it’s automatically included.
How soon after cleaning can I walk on the tile before sealing? Truck-mounted hot water extraction on tile floors dries fairly quickly with good airflow, but the timeline for sealing is different from the timeline for normal foot traffic. Light walking is usually fine much sooner; sealing specifically requires the fuller 24-72 hour dry window discussed above.
Will sealing grout stop pet urine odor or stains? Sealing can reduce how much a future spill soaks into the grout, which helps with new accidents. It does nothing for odor or staining that’s already embedded from before the grout was sealed — that has to be addressed during the cleaning stage, not the sealing stage.
Is grout sealer the same as tile sealer for natural stone floors? No. Natural stone like travertine or slate often needs its own stone-specific sealer rather than a generic grout product, since stone porosity and chemical sensitivity differ from cement grout. If your floor mixes natural stone with cement grout, treat them as two separate questions rather than one.
Keeping your tile and grout looking good in a Denver metro home really comes down to two separate jobs done in the right order: get the embedded soil and residue out first with a proper deep clean, let the grout dry completely, then decide on sealing based on the grout type and how the space actually gets used. Skip a step, or rush the drying time, and you’re just trapping problems instead of solving them.